

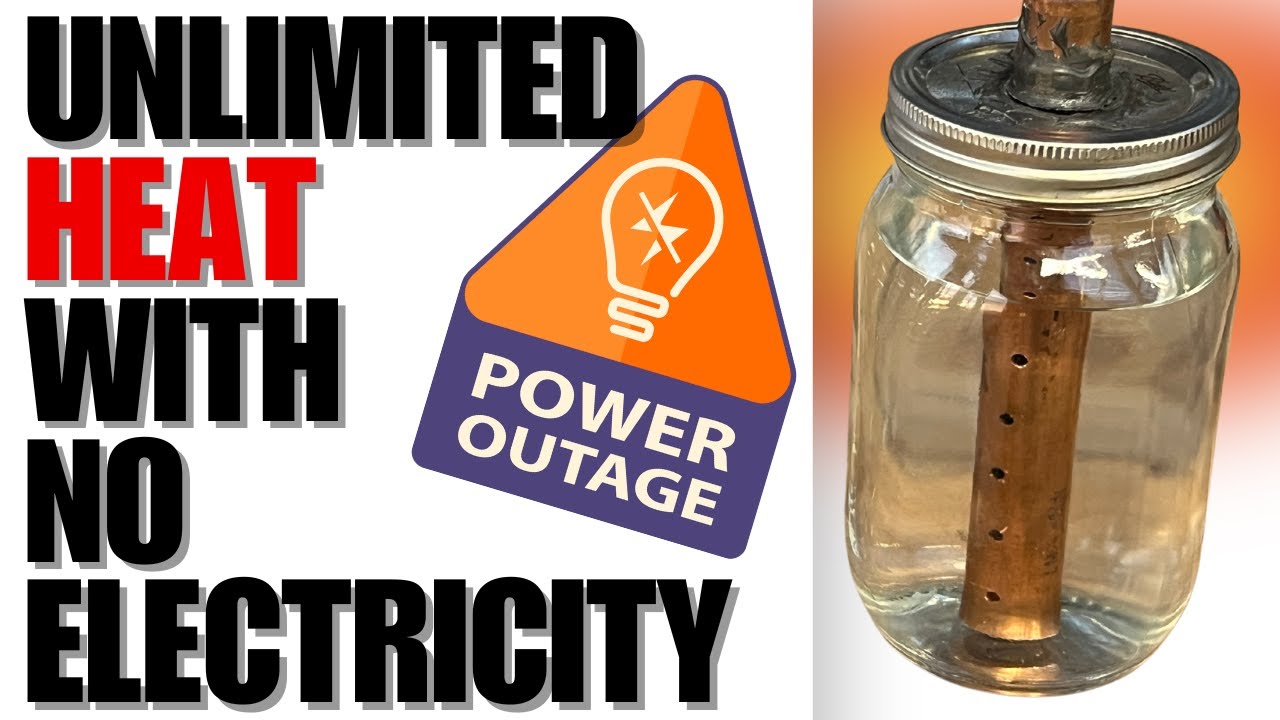
hey guys today I’m going to show you how to make a forever copper candle this type of candle will burn indefinitely you’ll never have to replace the wick you’ll only need to refuel it and it will heat and light any area so if you have a power outage you’ll not only have a lot of light but you’ll have heat and this generates quite a bit more heat than some of the other candles I produced in the past this will actually heat a room my other ones was for this green house just to keep the temperature above 32 but this can also heat an interior room to a very comfortable 60 to 70° so one of the first things you’re going to need is a glass jar with a metal lid now this one I think was for pasta sauce I believe you can use a mason jar but the great thing about this system is this will Wick your fuel from the very bottom of the container all the way up to where your torch is burning so this will work great for like I said keeping those rooms warm and it’s super simple to build so let me do it step by step and show you how to make one of these copper forever Candles now the first thing you want is you want to C calculate the distance of your outer piece of copper so you want it sticking out of your jar just a couple of inches so you’ll need to mark it with a marker before you cut it and make sure you’re going to have about 2 in out of the top from the very bottom so let’s mark that right there and the simplest way I know how to cut Co copper without a power tool is using one of these devices right here you can just simply put your copper in it slowly tighten it as you go and it will slowly as you round it each time it will slowly cut into to your copper and slice a piece of copper off whatever size you need all right I’m going to try to make sure this is in frame here which is not too easy to do when your hands are occupied and you can’t see the camera lens all right let’s set this into our device make sure we’re lined up with our cutting portion and just slowly tighten and twist your pipe so you can start a small cutting there now we’ve cut our piece there and let’s test it make sure it’s going to be about 2 in out of the top of our jar whatever it’s a mason jar any type you use so look like we’re coming out close to 2 in right there and that’s what we want we want it to be a little bit raised up off of the top of this jar here next we’re going to need to drill a hole in the top of this jar all right we’re going to drill a hole right in the center of the top of this jar now this is a 5/8 excuse me a 7/8 bit and that’s about the right width for this it’s going to be a really tight fit in the top of our jar just going to carefully put that in there all right now this happens a lot with these jars when you’re cutting them you’ll sometimes have a piece of the metal flake off that’s usually from putting too much pressure on it but it’s okay cuz I’m going to use a special sealant but let’s just test it make sure it is a tight fit twist it around there this is going to be a super tight fit now we’ve got a little bit of a gap here but I’m going to fix that pretty easily with a product that you may or may not have heard of before is JB Weld now this product you have two types of JB Weld you have the type that takes a long time to cure and you have the JB quick weld this cure in about 6 to 7 minutes so make sure you order this I’m going to put the links in the description Down Below in the description of the video to all the products I’m using but the JB quick weld will completely dry in about 6 to 7 minutes now next we want to make sure that our carbon felt Wick stays very saturated with our fuel and this is carbon Wick you can find this on Amazon like I said it’s in the link in the description but this specifically is what you want to use it will not burn up it can take up to over 1,000° in temperature and so we want make sure that that felt that carbon felt has a lot of saturation from our chemical so we’re going to drill holes three or four holes down the full length of our tube that’s going to be inside the bottle now I’m hoping you can see that clearly but I’ve put in five holes along the full length of our pipe that’s going to be inside the bottle that’s going to help feed our Wick some sometimes it’s a little bit harder to take it from the bottom so this keeps the wick moist and all the fuel moving to the top of the bottle so I’ve tried a lot of different configurations I probably made six or seven of these just testing different ways so that’s one thing you need to make sure to do in the inside the bottle make sure you drill your holes there now as I may or may have not have mentioned this is a 3/4 piece of copper and the interior piece of pipe is going to be a half inch piece that’s going to slip down in there and we’re going to wrap our carbon felt we want this coming out anywhere from 1 in all the way up to 5 or 6 in depending on how big of a flame we get however tall this is is going to also determine how tall our flame is but I’m going to make this one just a couple of maybe an inch and a half two inches out of the top of our pipe so I’m going to cut it about right there and make sure at the bottom that it’s coming all the way there and I’m just going to carefully mark this if I can find our pin there so I can cut it and I’ll carefully cut that again with our tool cutting tool there we’re just going to come down on it a little bit make sure we’re lined up properly there and just do some gentle rotations and each time you just tighten this down just a little bit goes a little bit deeper into the copper and of course it always falls off on me because I need an extra pair of hands slowly rotate it there there it goes cut super easy in this copper and be careful cuz sometimes these edges can be a little bit sharp you might want to take some sandpaper to them and soften them up there to make sure you don’t accidentally cut yourself now again let’s test it and see how far into the pipe that goes good it’s sticking out a little bit there just as we want it to now what we want to do is we want to cut a piece of carbon felt to completely wrap the inner carbon and this is a little bit of the tricky part I’ve had a lot of problems getting this just right but you want this one’s a little bit short so I’m going to have to go get another piece of carbon F we want it to the full length coming all the way to the top maybe slightly above all the way to the bottom and we need to fit that all the way down into our outer pipe on our forever copper candle now one thing I forgot to mention is is on this piece of inner copper that’s coming out of our 3/4 we want to put in some small holes in this these are about 1/16th of an inch so we’re just going to put a couple in there and put one two on each side and I think that’s going to help our flame it’s going to go up the flame is going to travel up the full length of the pipe and actually at the top of the pipe there’ll be a flame coming out here the product I’m using Burns extremely clean so the flame is nearly invisible so I may have to go into a darkened area of the greenhouse to show you what a great product this is and it’s something you can buy relatively cheap so let’s cut our two holes here now having these holes in here is going to help the height of the flame now I’ve left my sanding block in the garage so I’ll go back and get that later and do a little bit of sanding on this cuz there are some sharp edges there so just be careful make sure you do a good job of sanding these down so you don’t cut yourself if you try to pull this out once it cools down never touch it when it’s been burning because this becomes red hot now I found that wrapping the pipe with this carbon felt it’s a little bit on the thick side so if you pull it and you can stretch a little bit and it kind of thins it out and makes it a little bit easier to wrap your pipe with because you’re going into such a tight fit when you comp do the half into the 3/4 so just do a little bit of pulling on it stretch it so it’s a little bit thinner before you cut it take your piece of copper and then carefully wrap it and then get an idea of exactly where it needs to be cut at you need to do it the full length of the pipe because sometimes these tend to bunch a little bit as you’re putting it in there so just know that you’ll probably need to cut off the excess once you’re through okay I’m just going to carefully cut that okay now I know where I want my cut to be made at all right so we’ve cut our piece of carbon felt and it’s a very snug fit Once you pull it a little bit it wraps but you do have to do a little bit of pulling you don’t want it to be too big because it’ll Bunch up in the larger pipe so just do do some pulling on it kind of stretch it and that thins it as well this makes it a little bit easier to get into our larger piece of pipe so let’s take this piece and like I said this is the little bit harder to do but you kind of do this circular motion twisting and it takes a little bit of effort you’re going to have to do this three or four times to get really good at it now I will tell you that is the most challenging part of making the forever copper candle is getting the felt just right because you have a very tight fit from the half inch to the 3/4 I’m going to recommend you can see we’ve got our top here I’ve drilled four holes and just the part that’s coming out of our 3/4 piece but at the top of this we’re going to leave about half an inch of this sticking out half an inch maybe a/ qu of an inch but the more you s leave sticking out the more that’s going to Wick and the bigger the flame you’re going to have so let’s cut the top of this off keep it about half an inch going to wrap it and make sure it’s nice and tight next thing we’re going to do is we’re going to fuel our fuel Reservoir and so that wicking action like I said before all of these holes right here are all of the holes along there are going to pull up our fuel into our flame and the higher you have this sticking out with all the holes drilled in it the higher your flame will be I’ve made three or four of these and I’m going to show you at the end of the video various Heights and how well they burned again I’ll probably have to do it in a dark part of the green house so you can actually see the flame because it’s such a clean burn you can’t see the flame it’s invisible now I want to talk just for a second about the type of fuel you can use in this I don’t think veget any type of vegetable oil is going to work because I don’t think it’s going to Wick it up properly because we have such a deep breath Reservoir so I’d recommend number one denatured alcohol and this is considered a fuel alcohol anyways you can use in a pinch if you don’t have denatured you could use rubbing alcohols now this is a 70% this is like a 99% the higher percentage you have the more clean the Burn’s going to be but even so I would recommend that you only put this somewhere in your house where there’s an way to exhaust the fumes because even the purest fuel might possibly add it to some toxic Vapor so like under a stove where you can vent it out even if you don’t have electricity with that exhaust there it can evaporate rise out of the house inside of a fireplace that if you don’t have it on if you have a gas fireplace you can just set it in there and allow the heat to come out but the vapors to go out through the fireplace if you have the flu open just a little bit so just remember the most important thing is safety when it comes to this I wouldn’t recommend doing this unless you know exactly what you’re doing and you understand the risk you’re taking so this is more of an emergency situation not an everyday use thing but one thing that you can buy and I’ll link it in the description as well is a Simply Safe system it is a system that will alert you by phone if there’s any problems such as water leaks or toxic fumes inside the house any type of carbon monoxide or anything like that I have one of those set up in my house and anytime something goes wrong I get an instant notification on my phone so I would absolutely recommend you have a Wi-Fi enabled or with a battery backup that will enable you if the power’s out if anything’s wrong but it will also sound even if the power is out even if the Wi-Fi is out you’ll still hear an audible alarm from that type of system if everything else is out you’ll still know if you’re got toxic fumes inside of the room now next we want to mix our JB Weld quick and we’re going to mix equal parts of both tubes and this is to prevent any spillage or any escaping of gases out of that little crevice there out of this crack right here we want to seal both the top and the bottom of this so we’re just going to put this in there and I’ll mix it with a paint stick probably not enough but we’ll try it and see if that’s enough and like I said this sets really quick amazing how it works compared to the standard one which takes a number of hours and we’re going to take our something where we can just paint it on kind of in a maybe a little bit of a sloppy method but we’re just going to go around the edges of this top and bottom and like I said we got a little area there that cut open a little bit too large when I was using our paddle bit so I’ll just make sure that I go all the way around and put a little bit more in that little spot sometimes that happens and we’ll just put a lot there then we’ll go to the bottom and do the same thing this is just a a little bit of a safety issue to make sure that we don’t Splash anything out now we’re going to go from the bottom do the same thing down here and you might actually use your paint stick to apply it if you have a large gap like that little bit messy but it’s not doesn’t have to be perfect unless you’re a perfectionist okay we’ve got it done on the top and the bottom we’re going to put it back into our jar and we’re going to do a little bit of work on our Wick here it’s a little bit needs to be a wrapped a little bit tighter may do a little bit more cutting on it but once the wick starts working we’ll be able to pull all of the the fuel all the way from the bottom all the way out a lot of Wicks will not do that some of the ones you’ve seen online are probably not going to work as well but this type of once that inner pipe is heated up it’s going to pull out quite nicely all the way to the bottom botom in this large reservoir of fuel now what I’m waiting for this one to completely dry with a JB Weld I’ve got three that I made previously and I feel like this one works fine there’s no issues with it but I made the copper pipe Too Short it will light relatively easily but one thing I’ve discovered now it’s very hard to see the flame but it is burning I’ll take these into a darkened area and show you on camera but they’re easy to light once it starts the wicking process until the wicking process process has started you may actually have to take something like an eye dropper take some of your product and drop it around the top and then try to light it now another thing is once this pipe gets really hot once this inner pipe gets hot it’s going to really this one right here puts out a huge amount of heat and I’m going to like I said I’ll show you that in just a second but this one is still burning the flame is burning so pure that you can’t see it that’s the denatured alcohol the less pure your fuel is the more you’ll see a yellow flame but this one like I said so we’re looking at about a 300° temperature right there it’s a little bit hard for me to hold it in just the right spot while looking at the camera but it’s a little bit over 300 degrees it’s like I’ve seen it hit 350 a couple of times but anyways there is a flame there but it’s burning fairly pure and you just can’t see it I’ll try to put something behind it maybe there you go with a black background you can see just a little bit better but yes it is burning and as that Center piece of copper pipe heats up you’re going to see this flame get bigger and it will put out quite a bit more heat now this is the second one I made and like I said before you sometimes have to prime it a little bit so you can put just a few drops of your fuel right at the top of your copper excuse me at the top of your Coop carbon felt is what I’m trying to say now let’s light this one we got our here around there and this this one to the right is still burning and sometimes if you try to light this with a match it’s not going to work very easy you really need a kitchen torch to do this now this one’s burning but as that heats up in that Center piece the Flame’s going to get bigger when I show you the third one you’ll be amazed at what the size of the flame is but this flame is coming up to about here and as it heats up the flame will get even taller now it’s really hard to see but I’ll hold some of this felt behind it so you can kind of get a better idea there is a flame running up at least right right when we first started it’s about halfway up and it’ll work its way up all the way to the top but it is burning and this one puts it out quite a bit of heat compared to the one two on the left this one is putting out probably 10 times as hot I’m going to get my thermometer here to see if I can get it to focus in just the right spot we have a small spot to hit trying to get this just right now I’m going to take one of the uh lunchroom trays so we’ll have a dark background so maybe you can see it just a little bit better now the flame is coming going to almost to the very top and it’s actually coming out of the top there’s quite a bit of heat being generated there and this one the third one I made that has the longer tube the inner tube is quite a bit hotter this could heat a room very quickly up to 60° if you were in a 20 to 30° situation so this one puts out a lot of heat I’m going to try to put a dark background so you can see that each one of these are burning and this one that I started first on the far on my far right is starting to pick flame is starting to pick up and it’s getting very hot as well as the second one but the third one there’s no comparison this one puts out a massive amount of heat and I believe this is the one if you were in an emergency situation you would want this long extended Center Copper tube this would heat a room quickly the other two are great for my Greenhouse I can leave them overnight and keep my Greenhouse from going into the freezing Zone easily so there’s still a lot of light in the greenhouse so I brought this into an area that’s a little bit darker so you can see the flame coming out and it again I can already feel the difference in this small room the area where I work on some other type of bonai the small Mame and Shan but it puts out a lot of heat and this will burn for a long time on that Reservoir heat it is super simple to put together but you can see that it works great and the other one I’m going to bring in here next it this is burning the denatured alcohol very clean burn you can see the blue flame there but I’m going to bring another one in this burn alcohol that has less Purity and you can tell the difference in the flame now this is the second one I’ve put together and this was using 70% alcohol again you can tell the flame is not quite as pure and clean but it is burning nicely it’s putting out a great flame so these can be put together in less than 10 minutes in an emergency if you have the right products you have the copper you have an empty jar you have the tools to put them together and everything I’ll put in the description but this again has about a inch and a half 2 in piece sticking out as opposed to the other one which had a 5 to 6 in piece which put out a lot more heat so the shorter your inner tube is the smaller your Flame’s going to be but still this could definitely keep the frost out of my Greenhouse or if you’re in a small room it could definitely warm it up a little not as much as the previous one the 5 to 6 in inner copper tube but this one will work in a pinch if all you have is some short pieces of copper now this is actually the first one of these I ever built and it has a very very small piece of inner copper sticking up maybe only about a quar of an inch above the outer copper it’s still working great there’s no issues with it but it was the first one I put together and I had not experimented very much but this one also puts out a good bit of heat I want to give credit where credit is due because this idea did not come to me in a dream this was actually put together by Robert Murray Smith he’s a British chap who has a channel and I consider him to be a mechanical genius he has some of the most interesting videos so I would highly recommend you go to his channel Robert Murray Smith he has just video after video of things that is just amazing to me and I love to watch his videos but anyways this is the first one I ever built and it wasn’t that hard but I would say that the longer inner copper tube is going to give you a lot more heat this works fine and this also has a less pure form of alcohol and you can see there’s more of a yellow burn so denatured alcohol the pure form this is the one you’d want to go with now in the past I made some of these flower pot heaters for my Greenhouse just to keep it warm overnight but I’ll show you a way you can do do this with this particular one let’s relight it and again A match is probably not going to light this well for you because you really need some good heat and once you get it lit you’re good but I just don’t think a match is going to help you so having one of these kitchen torches and again I’ll link it in the description is going to work a lot better the flame again you can’t hardly see it because there’s so much light in the greenhouse here but appear it’s very hot but let’s carefully set the flower pot on top of it try not to knock it over there I’ve got some of these deck Hardware from where I built the deck nice and hot now something like this a metal you can capture more heat you can use one of these metal I believe this was a utensil holder so you just put that up there so you have heat being captured here and slowly rting out same thing up here it’ll get really hot really quick I can feel heat building I’m going to do some more temperature testing there and show that on screen or maybe in the thumbnail but again that’s a great way to capture heat and help radi it out into my Greenhouse or in an emergency situation somewhere like that all right let’s do some temperature test and we’ve only been burning this for just a few minutes let’s see what’s happening here and so over time this entire flower pot is going to capture that heat and slowly radiated out into the room now I’ll put the link up above to the flower pot heaters I’ve done in the past but this one is really starting to heat up well this had a lot of moisture in it previously so that is not smoke coming off of it that’s actually Steam from moisture that was inside the flower pot because previously I used this as a filtration video it’s a water filtration video that I put together and so that’s why is a so much moisture inside of this pot because of that video and I’ll put that video right here up above but again this is just steam coming off the pot all the moisture escaping from that pot so let’s do one last temperature check right here on the copper pipe amazingly I’ve seen over 900° so this candle heater lighter gets extremely hot sometimes you don’t see the flame you don’t realize it’s lit if you’re using a really pure alcohol so just be careful with that because sometimes you won’t even see it there all right so this last one I just built and this is the one I built at the beginning of the video again I’ve primed it by putting some of our fuel right here around the carbon felt I’ve poured a little bit in there so when we first light it we’re going to see a little bit of the debris or the impurities in the carbon felt burning off now even though our fuel is way down here at the bottom that slow low wicking action will slowly work the fuel all the way up to the flame this flame will become a little bit less yellow but it’s still going to be more yellow cuz I’m using again the rubbing alcohol rather than the denatured alcohol now lastly I’ve added the stainless steel mesh and this is just basically a tuna can but it is getting red hot on that tuna can I’ll show exactly how hot it is just by putting a little bit of water up there so it is extremely hot and I think the can May Crack is gotten so hot but anyways yeah that’s one of those things that you can do you can put some stainless steel Mets to kind of capture and radiate the heat out also you can put a top on it to catch some of the heat try not to put too much water on it or you might have a little bit of a steam explosion there but anyways that’s another thing you can do is by using the stainless steel mesh I got this off Amazon and again I’ll put a link to everything I’ve used in this video except for the copper pipe I think it’s too expensive to buy online I think you’re much better off getting that from a hardware store so guys I really appreciate you watching and if you have any questions about this video or any previous video please become a public subscriber first because I always put those questions to the front of the line if you’re a public subscriber I get so many videos during the day it’s just hard to answer them all i’ be spending two or three hours a day answering and responding and giving my opinion about those questions so again safety is Paramount with this if you are not experienced with dealing with this type of stuff don’t do this so just remember safety is number one above everything else so guys have a great day [Music]
Read More: Roland SMACKS Mitch! ‘Crypt Keeper’ McConnell OUTRAGED Over 2 Dem Jugdes Reversing Their Retirement